Selenium is an open-source automated testing suite for web apps. It was at first used to automate tests for web applications as it can emulate user interactions with browsers, although its scope is wider as it can be used for other purposes: such as webscrapping for example.
— Related practical session Jupyter Notebook —
How does Selenium Webdriver work ?
How to programmatically create user interactions with Selenium ? through its WebDriver component
It allows users to simulate common activities performed by end-users; entering text into fields, selecting drop-down values and checking boxes, and clicking links in documents. It also provides many other controls such as mouse movement, arbitrary JavaScript execution, and much more.
Every web browser are different in their ways of performing operations, Selenium WebDriver API aims at giving a common language neutral interface, whichever browser you may use, whichever language you code with.
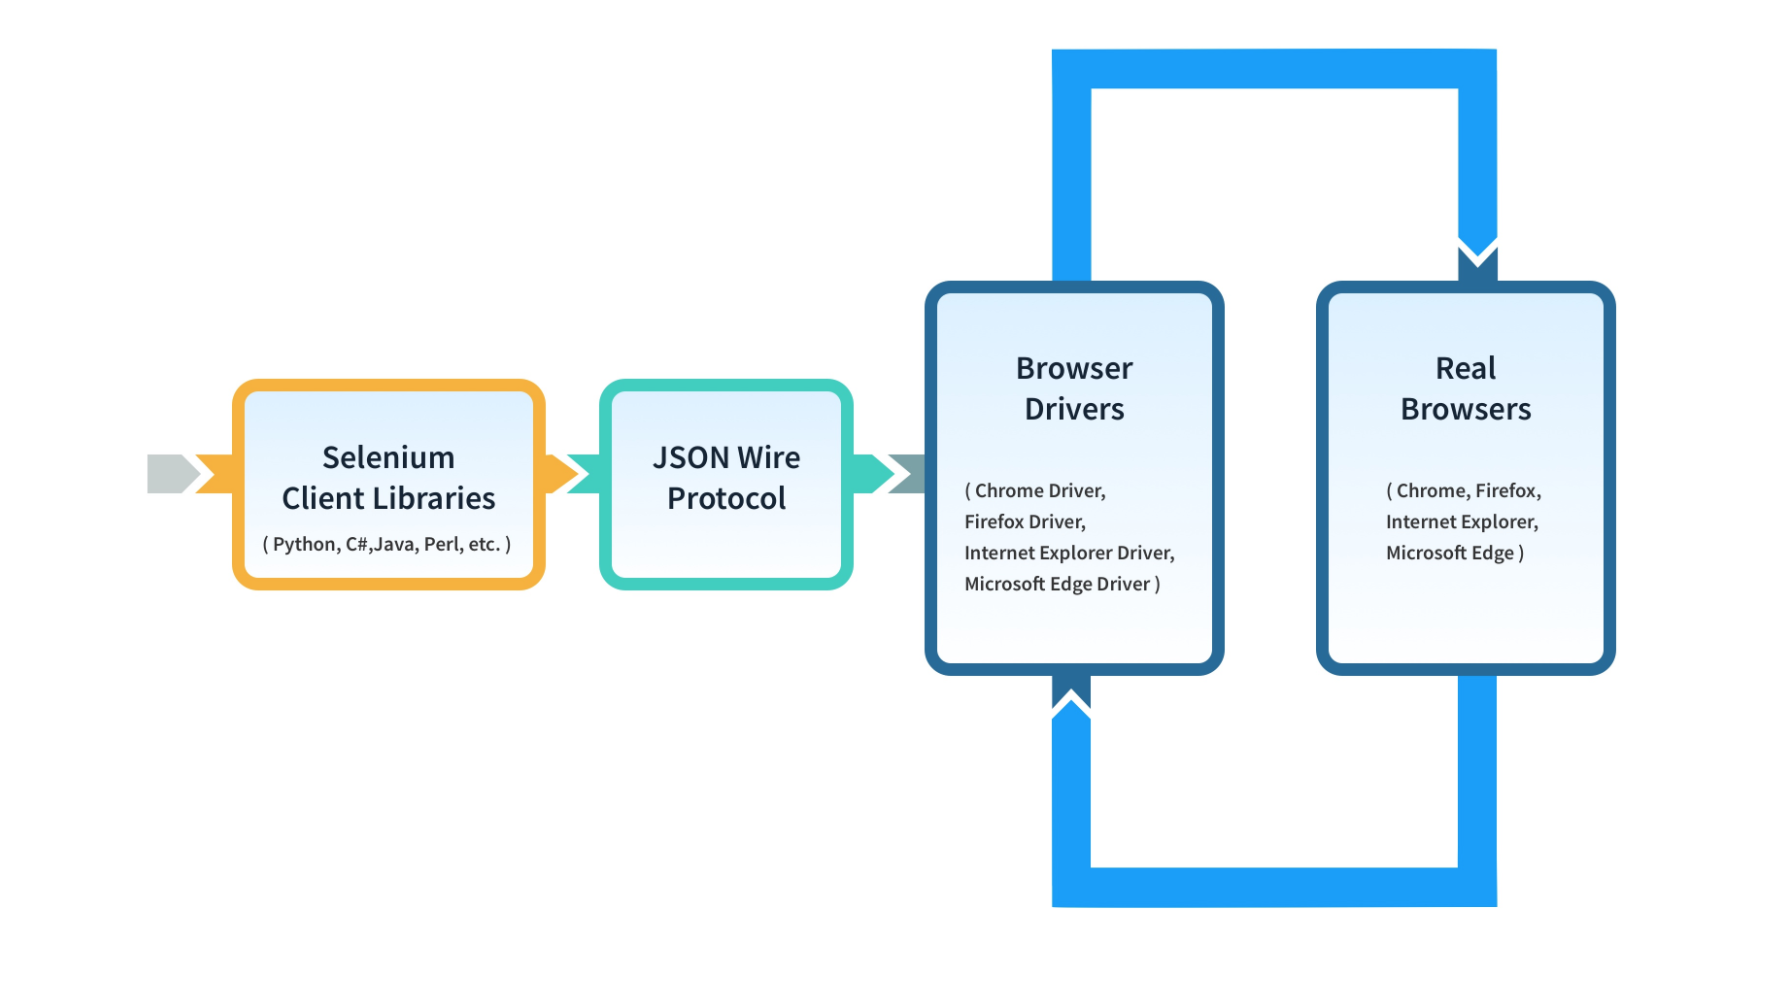
- Downstream, one * “ browser driver”* (many exist), i.e. “one Selenium WebDriver implementation” , is a layer:
responsible for delegating down to the browser, and handles communication to and from Selenium and the browser. To do so, it uses the automation APIs provided by the browser vendors.
- Upstream, Webdriver API also refers to the language bindings to enable developpers to write test cases in different languages like Python, Java, C#, Ruby or NodeJS.
Thus, referring to both the language bindings and the browsers controlling codes, the Webdriver API aims to abstract differences among all browsers by providing a common object-oriented interface.

How does your Python code get executed in the browser? By JSON Wire Protocol, tie to the Webdriver API.
Each webdriver implementation (e.g. ChromeDriver) has a little server waiting for the Python commands (try to execute the chromedriver.exe file and you will see on which port it is listening too).
You can communicate directly with the Webdriver implementation API (e.g. Chromedriver API), but also can use a selenium Python client library for issuing those requests one by one as HTTP client requests for the WebDriver server.
When these commands come in the form of HTTP ones, the Webdriver implementation interprets those, ordering the underlying browser to perform them, and then returns the results back to the Webdriver API through the wire protocol.
WebDriver became recently a W3C standard, it is an interface provided by Selenium. Thus, all classes (e.g. ChromeDriver) implementing this interface need to have a certain set of methods. It is then a structure/syntax that allows the computer to enforce certain properties on a class, certain behavior or requirements any object instanciated with that class must fulfill.
A good example to read. Also Safari Dev docs highlights this schema
Edit: WebDriver W3C Living Document has replaced JSON Wire Protocol.
Note from wikipedia: Where possible, WebDriver uses native operating system level functionality rather than browser-based JavaScript commands to drive the browser. This bypasses problems with subtle differences between native and JavaScript commands, including security restrictions.
Interesting article to read too
Installation
Reading the installation process from the unofficial but thorough community docs is a good starting point to set the tools we need.
- Create a virtual environement
- Install Python bindings client library:
pip install selenium - Takes a (web)driver matching with the browser you want to automate a session in. I.E. I have Chrome, i can download the ChromeDriver here for the matching version of Chrome I have.
- You can put the downloaded driver (e.g.
chromedriver.exe) in the current working directory and reference its path./chromedriver.exelater in the webscrapping code for the instanciation of aChromeDriverinstance. Altough this may not seem ideal as the script will rely on the path where any person put the driver in. Hence it is better toexportthe executable driver path first and then not use anything in the code.
As per the requirements of ChromeDriver:
The ChromeDriver consists of three separate pieces. There is the browser itself i.e. chrome, the language bindings provided by the Selenium project i.e. the driver and an executable downloaded from the Chromium project which acts as a bridge between chrome and the driver. This executable is called the chromedriver, we generally refer to it as the server to reduce confusion.
Later on I will use the term browser driver for the controlling code provided by browser-vendors, to not confuse with language driver, the bindings provided by Selenium project as a client library for communciating with the Webdriver (or one of its implementation).
Initialisation
I use the Chrome Webdriver hence the line below does set up a Webdriver server and ultimately launch a new browser session using the browser driver.
When we’re done, we can later use close()method to close the automated browser initialized session.
We could also use the driver context manager using a with statement.
from selenium import webdriver #
driver = webdriver.Chrome()

##
## Your operations
##

driver.close() # to close the browser tab (window if there is only one tab.)
Operations
Navigating
-
Going to an url:
driver.get(url_name) # loaded when `onload` even has fired -
Selecting an element:
# ! find element return the first element matching ! driver.find_element_by_class_name() driver.find_element_by_css_selectorn() driver.find_element_by_link_text() # the text attached to the link driver.find_element_by_partial_link_text() # part of the text attached to the link driver.find_element_by_name() #name attribute of the element driver.find_element_by_id() #id attribute of the element driver.find_element_by_xpath() #using XPath, see later driver.find_element_by_tag_name() #tag name driver.find_element() # private method, you can use By from selenium.webdriver.common.by import By, rather than using the shortcuts methods https://stackoverflow.com/questions/29065653/what-is-the-difference-between-findelementby-findelementby # Note that you can use directly on a webelement: # <webelement>.find_element_by...() will use the element as the scope in which to search for your selector. https://stackoverflow.com/questions/26882604/selenium-difference-between-webdriver-findelement-and-webelement-findelement # An example provided here https://github.com/Luc-Bertin/TDs_ESILV/blob/master/webscrapping_test2find_element.ipynb # # # When no element exist: NoSuchElementException is raised # ! find elementS return a list of Web elements ! driver.find_elements_by_class_name() driver.find_elements_by_css_selectorn() driver.find_elements_by_link_text() ## ... # When no elements exist: just an empty list - Interacting with forms:
- send keys to a form field / input:
element = driver.find_element_by_name("loginform") element.send_keys("mot_de_passe") ## To add use special keys in the keyboard: from selenium.webdriver.common.keys import Keys - clear the content of the form
  element = driver.find_element_by_name("loginform")
  element.clear()
- send keys to a form field / input:
- Toggle the selection of checkboxes:
# example: https://www.w3schools.com/howto/howto_custom_select.asp from selenium.webdriver.support.ui import Select select = Select(driver.find_element_by_tag_name("select")) # Select by index (starts at 0) select.select_by_index(2) # Select by visible text #select.select_by_visible_text("text") # Select by value select.select_by_value(value) # Deselecting all the selected options (for mutliselect elements only), a good example of multiselect # https://www.w3schools.com/tags/tryit.asp?filename=tryhtml_select_multiple select.deselect_all() # loop over options available for option in select.options: # print their text print( option.text ) - Managing Pop-Up dialogs (javascript
alerts):# A good example of alert here: http://demo.guru99.com/test/delete_customer.php # Wait for the alert to be displayed alert = wait.until(expected_conditions.alert_is_present()) # Switch to the alert pop-up alert = driver.switch_to.alert # Check the content of the alert alert.text # Click on the OK button / accept the alert the pop-up alert.accept() # or dismiss it: alert.dissmiss() - Moving between windows
driver.switch_to.window("windowName") # to find out the name of the window you can check the link or js code that generated it # or loop other all windows handles by the driver for window in driver.windows: driver.switch_to.window(window) - Moving between frames
# by name of the frame driver.switch_to_frame("name_of_frame") # by index driver.switch_to.frame(0) # a subframe of a frame driver.switch_to.frame("name_of_frame1.0.frame3") # going back to parent frame driver.switch_to.default_content() -
Cookies
 # 1. Go to the correct url / domain
 # 2. Set the cookie, it is valid for the entire domain
 # the cookie needs a 2 key:vals at least:
 #  - 'name':<name> of the cookie
 #  - 'value':<thevalue> of the cookie
 #  You can set additional params such as if the cookie is HTTPOnly or not
 #  E.g.
 driver.add_cookie({'name':'test', 'value':'thevalue'})
 # 4. Get all cookies
 driver.get_cookies()
 # As an exercice you can apply this to check that you have a new EU cookie consent record after clicking the pop-up where you accept the use of cookies by the website

 [{'domain': '.w3schools.com',
   'expiry': 1633354196,
   'httpOnly': False,
   'name': 'euconsent-v2',
   'path': '/',
   'sameSite': 'Lax',
   'secure': True,
   'value': 'CO5eHhQO5eHhQDlBzAENA2CsAP_AAH_AACiQGetf_X_fb2vj-_599_t0eY1f9_63v-wzjheNs-8NyZ_X_L4Xv2MyvB36pq4KuR4ku3bBAQdtHOncTQmRwIlVqTLsbk2Mr7NKJ7LEmlsbe2dYGH9vn8XT_ZKZ70_v___7_3______777-YGekEmGpfAQJCWMBJNmlUKIEIVxIVAOACihGFo0sNCRwU7K4CPUECABAagIwIgQYgoxZBAAAAAElEQAkBwIBEARAIAAQArQEIACJAEFgBIGAQACgGhYARRBKBIQZHBUcogQFSLRQTzRgSQAA'},
  {'domain': '.w3schools.com',
   'expiry': 1633354196,
   'httpOnly': False,
   'name': 'snconsent',
   'path': '/',
   'sameSite': 'Lax',
   'secure': True,
   'value': 'eyJwdWJsaXNoZXIiOjAsInZlbmRvciI6MywiY3ZDb25zZW50cyI6e319'},
  {'domain': '.www.w3schools.com',
   'expiry': 253402257600,
   'httpOnly': False,
   'name': 'G_ENABLED_IDPS',
   'path': '/',
   'secure': False,
   'value': 'google'},
  {'domain': '.w3schools.com',
   'expiry': 1599744590,
   'httpOnly': False,
   'name': '_gid',
   'path': '/',
   'secure': False,
   'value': 'GA1.2.1056235777.1599658190'},
  {'domain': 'www.w3schools.com',
   'httpOnly': False,
   'name': 'test',
   'path': '/',
   'secure': True,
   'value': 'thevalue'},
  {'domain': '.w3schools.com',
   'expiry': 1606003200,
   'httpOnly': False,
   'name': '_gaexp',
   'path': '/',
   'secure': False,
   'value': 'GAX1.2.U2DF0lIpTsOVepnCdIak9A.18588.0'},
  {'domain': '.w3schools.com',
   'expiry': 1662730198,
   'httpOnly': False,
   'name': '__gads',
   'path': '/',
   'secure': False,
   'value': 'ID=34d373f41409cec7-229cd97515a60048:T=1599658198:S=ALNI_MaHAR9T3-JOlXvVv0J_m6hrSCzcPQ'},
  {'domain': '.w3schools.com',
   'expiry': 1662730190,
   'httpOnly': False,
   'name': '_ga',
   'path': '/',
   'secure': False,
   'value': 'GA1.2.669605950.1599658190'}]
XPath
Although it is part of the navigation, I think it should be dedicated an entire section.
In XPath you can select a lot type of objects (also designed as nodes). Among them: attribute, text, or element.
A good read for XPath
Here on dot notation in startswith in XPath
Here on dot versus text()
And on the current node vs everywhere
//ol/descendant::code[contains(text(), "//*")][2]
node-set passes to starts-with function as 1st argument (@*). The starts-with function converts a node-set to a string by returning the string value of the first node in the node-set, i.e. only 1st attribute
Waits
A lot of browser are using AJAX (asynchronous javascript and XML), hence making calls from a client to the server asynchronously to modify components in a web page without needing to refresh the concerned page. Although this separates the presentation logic from the data exchange logic and greatly improve user experience, a “loaded” page doesn’t mean other scripts won’t display other elements later on.
implicit wait:
For the whole lifetime of the WebDriver object, each time an object is not available on request, repeat till n seconds elapsed.
explicit wait:
Makes the webdriver wait for a certain condition to execute further instructions.
from selenium.webdriver.support.ui import WebDriverWait
from selenium.webdriver.support import expected_conditions as ec

# timeout after 10s without success
# or returning the web element otherwise

try:
	element = WebDriverWait(driver, timeout=10).until(
		ec.presence_of_element_located((By.ID, "myDynamicElement")))
except TimeoutException:
	print("Looks like it didn't work out during the time requested")
# caution: inside the expected condition class constructor, you must fill a locator in the form of a tuple (by, path)
Directly from the docs here are some convenient expected conditions class’constructors you can use:
- title_is
- title_contains
- presence_of_element_located
- visibility_of_element_located
- visibility_of
- presence_of_all_elements_located
- text_to_be_present_in_element
- text_to_be_present_in_element_value
- frame_to_be_available_and_switch_to_it
- invisibility_of_element_located
- element_to_be_clickable
- staleness_of
- element_to_be_selected
- element_located_to_be_selected
- element_selection_state_to_be
- element_located_selection_state_to_be
- alert_is_present
Custom wait conditions are also interesting to check as it uses some concepts (__call__) we have covered elsewhere in this blog.
Action chains
One of the most useful WebDriver tool:
ActionChains are a way to automate low level interactions such as mouse movements, mouse button actions, key press, and context menu interactions. This is useful for doing more complex actions like hover over and drag and drop.
Usage:
# 1. import the class ActionChains
from selenium.webdriver.common.actions_chains import ActionChains
# 2. Keep for later the elements you are going to interact with
menu = driver.find_element_by_css_selector(".nav")
hidden_submenu = driver.find_element_by_css_selector(".nav #submenu1")
# 3. ActionChains constructor expects the driver
pile_of_actions = ActionChains(driver)
# 3. stack of actions (not performed yet)
actions.move_to_element(menu) # moving the mouse to the middle of the element
actions.click(hidden_submenu)
# 4. perform the stored actions in the order it was defined (top to bottom)
actions.perform()
move_by_offset(xoffset, yoffset) is really useful to cause web animations/interactions which rely heavily on the user’s mouse moves. It moves to an offset (x or y coordinates) from current mouse position.
See example below (this is for educational purposes only !)
injecting js code in the browser
One use case could be to scroll in a news or social network feed. Here is an example of such:
additional infos
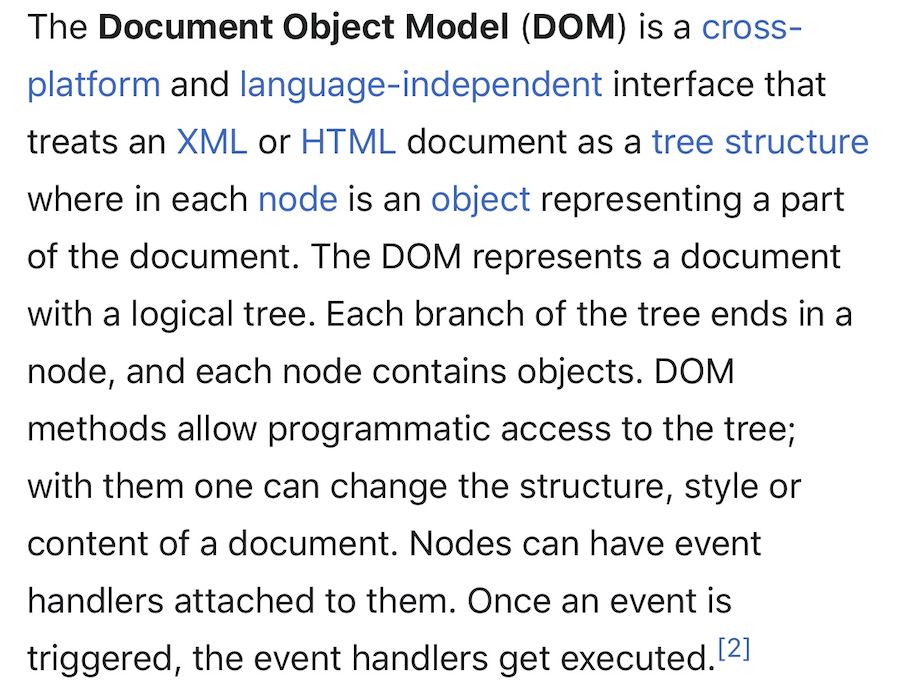
DOM: Document Object Model Wikipedia best describes it:

Another interesting link on the difference between RemoteWebDriver and Webdriver

 Some Python exercices